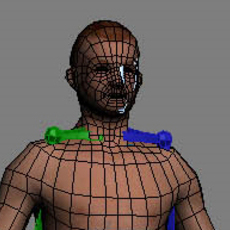
step2
before we assign any kind of skinning to the character we need to fit the biped inside the character.
To do this you have to go into figure mode; in figure mode you can scale the bones, add and remove bones, copy poses and so fort.
select the biped(any part of it)>motion panel>figure mode
now we can start posing the biped to fit the mesh. Before you actually beging posing make sure to place the center of the biped in the centre of the mesh.
This seems logical, but is often forgotting:
in the structure menu (see image below) you can add or remove bones from the biped. What settings you use here determine the level of control you will have over you character
later on. Since this is a simple low poly character I chose to have one bone for all toes(most of the time you dont need to animate toes seperatly and this will speed up the animation process),
3 spine links, and 5 fingers with 3 links each(fingers are important when animation, even in low poly
characters). ONLY POSE ONE HALF OF THE BIPED (we will copy the this pose to the other side).
When posing always check the direction of the bones. this becomes more evident in the fingers, especially the thumb. The thumb should be able to rotate inward to clench a fist.
make sure the rotation is set up to permit this,. Often times this will only be become noticeable when actaully animating and it will be a hassle to fix later on.
so actually rotate the thumb inward and see if it rotates in the same direction as you own thumb. Usually when this is done wrong its very subtle it moves to far outward or inward.
This ofcourse counts for all bones, if for example the knees of your character are rotated outword, make sure you bones are rotated in the same direction.
just scale move and rotate till everything fits.
when done it should look something like this:
Now all we need to do is mirror his posed side over to the other side.
to do this:
Select all the bones you wish to mirror> copy/paste tab> create collection> copy posture> paste posture opposides.
now turn off figure mode! if you start skinning with figure mode on you will likely change the basic pose
now were done posing! lets move on to skinning.
side note: It is important to know that the position of the bones determens how the mesh will be deformed; if you put the bones to close to surface strechting will appear when bending.
It is best to position the bones as they are positioned in real life, look up some reference images and position them accordingly. as a rule of thumb you can just put them
in the middle of mesh that the bone is supposed to deform and in most cases it should be fine. when working on higher resolution character this becomes more important.
Author: wouter_vugt
Submitted: 2010-05-26 15:56:49 UTC
Tags: animation, basic, modifier, Rigging, physique, and biped
Software: 3dsmax
Views: 219,010
Related Items
-
SearchNPick Animation Picker 1.3.0 for Maya (maya script)
$100.00 (USD) -
BitCake Exporter - a Game Animation plugin 1.1.0 for Maya (maya script)
$20.00 (USD) -
"Rapid Rig: Poser" for Maya for Maya 2.0.9 (maya script)
$20.00 (USD) -
BMX RIDER Rigged with bmx and animation 3D Model
$15.00 (USD) -
The Rigging Toolbox 2 for Maya 2.0.5 (maya script)
$35.00 (USD) -
Quadruped Path Animation System 1.1.4 for Maya (maya script)
$80.00 (USD) -
JPose and Animation Tool for Maya 1.2.2 (maya script)
$20.00 (USD) -
Animation Data Recovery 1.1.0 for Maya (maya script)
$100.00 (USD) -
Casual Male 03 Rigged for Maya 3D Model
$39.00 (USD)


